
Nakar
-
Content count
40 -
Joined
-
Last visited
-
Days Won
1
Everything posted by Nakar
-
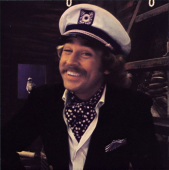
I haven't played MGS5 in a couple of years and got back into it recently with the help of a few mods, notably Infinite Heaven (a convenience and tweaking mod that lets you streamline the game or alter the difficulty to your liking). As it so happens, I did a restriction run back in 2015 where I was only allowed to play as crappy Diamond Dogs soldiers with no real gear. It was fun and challenging but I sucked at the game and it was boring. I'm a lot better now than I was, so I decided it might be fun to do another runthrough with a similar idea but more freedom allowed. I don't have a nailed down ruleset yet, but the following things are generally going to be obeyed: Play as Snake/Avatar. Bionic Arm passive upgrades are OK. No Quiet, D-Dog, or D-Walker (unless something funny comes up), as they're way too powerful. D-Horse is OK. Mission deployment budget cannot exceed 10,000 GMP. Anything can be brought, subject to additional restrictions, as long as it's under budget. Exception for vehicles: Vehicles cost no GMP to deploy as long as you have one in reserve, so I'll just say unarmed vehicles are alright but anything with a gun is not. No fighting Quiet with a tank. As far as material requirements go, I don't really count those as part of the budget because it'd be too annoying to do so. Most things that cost under 10k don't have onerous material requirements anyway. No Primary/Back slot weapons. They can be acquired OSP from enemies though, and used if desired. Pistols and the Bionic Arm are more powerful than rifles anyway. No Fulton. I've actually set up IH in such a way that prisoners and hostages cannot be Fultoned at all, but I will also not Fulton guards. No Supply Drops or Support actions in general. Most of them are rank-restricting anyway, and cost GMP. No Intel Team updates to enemy positions. This is normally impossible to turn off but IH allows it so I did it. Marking is still allowed because the game is pretty annoying without it. Reflex Mode is off. I'd have it off anyway because I use CQC a lot and that often triggers Reflex unnecessarily which kills your rank. Daytime infiltrations only. Any time between 6 AM and 6 PM is fine, with a preference for starting no later than 1-2 PM. Timescale is set slower in IH so it should never reach sunset mid-mission but obviously letting the sun set is not OK. Start all missions on foot (IH lets you skip helicopter rides in) and exit by land wherever possible. Choppers are allowed if required or if Miller calls one for you, and if there are >3 people to extract since it's impossible to extract four or more people via land without Fultoning. I'm not going to restrict myself to an unupgraded chopper because the lowest rank takes ages to arrive but I won't use any missiles or armor on Pequod. I will also not use the exploit where you call in Pequod and let him kill everyone for you with his machinegun without those kills "counting." S Rank every mission with Foxhound, so of course no rank restricting items or actions (not a problem, most are too expensive anyhow). No Traces (the super bonus) is not required but I may aim for it now and then (so far I haven't managed to get it once). Other than that don't worry about score. Due to the nature of this I'll be avoiding kills too, though I will have to destroy vehicles (vehicles have drivers, but enclosed vehicle kills don't count the driver deaths against you). All of these rules can be overridden in the name of fun, within reason. The full playlist is here. Useful Equipment & Why It's Useful Water Pistol (210 GMP): Free, infinite ranged distraction (though not as reliable as a Magazine). It's also cheap, can hold up enemies (they don't know it's not a real gun), and can extinguish fires and short out electrical equipment. While technically more expensive than the cheapest tranquilizer pistol, the Water Pistol tends to be my preference. Burkov TB (2940 GMP): The only tranquilizer gun I normally use, and I try not to use it much. Unlike the Windurger (default tranq pistol), it's an automatic and has a much faster rate of fire which is good for quickly incapping somebody without needing a headshot. Carries more ammo too. Has a shitty suppressor, but with weapon customization I can fit a tier 3 suppressor on there. There's an improved Burkov with an infinite suppressor and much better iron sights, but it's too expensive to deploy with under my rules. Riot SMG (700-4900 GMP): Another non-lethal Secondary slot weapon. Shoots rubber bullets which are easier to hit with than tranqs but don't do much against armor, and has a crappy suppressor. Still sometimes useful, and inexpensive at the lower Grades. Grade 7+ has a better suppressor but costs 29k GMP so that ain't happening. Stun Arm (3700 GMP): Relatively cheap at Grade 4 despite being very powerful. Can be charged up to stun every enemy within 40m every few minutes or so. I don't abuse this too much but it's really handy sometimes, and for its cost it's a steal. Hand of Jehuty (4600 GMP): Ranged CQC/grab enabler. There are three ranks of this, each adds more battery and increases the range it can snag people by 10m. First rank doesn't have enough range or charge to be worth anything, and the final rank is Grade 7 and costs over 60k (plus almost 600 Precious Metal, itself worth at least that much GMP). Grade 5 makes a good compromise on range (20m is fine) and price (4600 GMP is a little expensive but sometimes worth it). Rocket Arm (4800 GMP): I never use this because I can't aim it for shit but it's capable of multiple ranged KOs. More expensive than Hand of Jehuty but workable. Magazine (0 GMP): They're free, infinite distractions that don't put enemies on alert. There's no reason not to bring them every mission. Decoy (1200-3600 GMP): Distracts enemies and more important makes vehicles stop for a second to destroy them. There's a version that makes noise and a version that can shock enemies for even more GMP but all are affordable except the Grade 7 Stun Decoy. Infrequently used but sometimes nifty. Hand Grenade (200-5000 GMP): Cheap and effective ranged destruction as long as you don't go past Grade 5; price jumps from 5000 GMP to 56k (jesus). Smoke Grenade (400-5200 GMP): Concealing smoke is sometimes useful. Doesn't really damage anybody though. Stun Grenade (1600-4800 GMP): Instant incapacitation, but really hard to use and loud as hell. Mostly there for bosses. Sleep Grenade (2800-4600 GMP): Excellent way to cause knockouts, though guards will dodge them a lot. Most useful against certain bosses as the gas is fairly quiet and enemies can't trace thrown weapons back to you as easily as they can gunshots. C4 (400-5200 GMP): Because I can't Fulton vehicles, I need to destroy them, and C4 is the only remote-detonated explosive available. Fortunately, it's also very cheap. ATB Mine (2500-6640 GMP): Tank mines, stronger than C4 and good for vehicle-heavy missions. Pricey though, but under this ruleset cheaper and more useful than the EMN Mines since I can't Fulton vehicles after disabling them. Cardboard Box (100-4900 GMP): The ultimate weapon. Has a variety of uses I haven't really touched on thus far. Its main value, to me, is the ability to fast travel by shipping yourself between outposts. Usually I go with the Grade 1 Desert box because it's the cheapest. Noctocyanin (1100-5300 GMP): A drug that lets you see enemies through walls. Pointless in single player where you can just use D-Walker or D-Dog to mark enemies through walls, but since I'm not using either of those guys this is often worth shelling out for. However, its high cost at the ranks where it matters mean sometimes I have to go without in order to make budget. Phantom Cigar (100-1500 GMP): Have yet to use it, but it allows for passing time more quickly which can sometimes be useful on timed missions when you finish your objective early. Camo (0+ GMP): Sneaking Suits are expensive and not that useful in daylight and Battle Dress is pointless if not going loud. That leaves camo fatigues, which are really good even if they offer no benefits to sound or health. Their main advantage is that choosing the right one for the operations area reduces the range at which enemies will see you, both in terms of noticing you (white mark onscreen showing they're aware of something) and in terms of spotting you to start an alert. I try to pick camo that matches and explain what it is every time, but the general rule of thumb is: "Rocky" camo for Afghanistan, "Greenery" or "River/Swamp" for Africa, "Concrete/Metal" for bases and other installations. Camos acquired through online events cost 0 GMP to deploy in as well, though sometimes I still use Olive Drab/Tiger Stripe because they only cost 100/200 GMP and that's rarely going to break the bank. Squares (the stock Concrete/Metal camo) costs more so having alternatives that don't cost anything is nice. D-Horse (0 GMP): The only buddy I'm allowing myself to use (so far), D-Horse is balanced and not gamebreaking. He offers mobility on demand which makes the runs less boring, he can teleport prisoners on his back to your position (rarely used, but might be useful), and he can poop on command. This is tactically crucial. That Guy You're Playing As Doesn't Look Like Big Boss... At the beginning of MGS5 you're allowed to create a custom avatar. Finishing the last story mission allows you to select your avatar as a character instead of Snake or a Diamond Dogs soldier. Mechanically, your avatar is identical to Snake (can use the Bionic Arm, has access to Naked/Scarf camo variants, voiced by Kiefer Sutherland, etc.). I tried to kind of make his face resemble a clean-shaven Big Boss, but you can only do so much with the editor. E1: Phantom Limbs Join a suspiciously clean-shaven Venom Snake in the rescue of Miller. We could get in and out stealthily, but instead we'll capture the entire outpost where Miller is held with a Water Pistol and our Zone of the Enders powers. E2: Diamond Dogs Skipped because it's a tutorial. E3: A Hero's Way This won't be the last time D-Horse is used as an ersatz mine layer. E4: C2W It's time for some actual espionage as I attempt to minimize knockouts/holdups and deal with the objective decisively and stealthily for once. E5: Over The Fence I briefly discuss the No Traces bonus as I almost got it on this run. No Traces is sort of a super duper point bonus that is hidden; the game doesn't even tell you it exists. To earn it, you basically have to avoid ever using the trigger action (anything with Mouse1 or whatever attack is on a controller) and certain other things. It's extremely restrictive and more or less requires ghosting; the main advantage is that it gives so many points that you're guaranteed an S rank if you acquire it regardless of how long it took. Don't worry about it. E6: Where Do The Bees Sleep? The first proper "story" mission, meaning there are some restrictions on starting and exiting. We can bypass some of the tedium with a Cardboard Box. A new threat reveals itself, which would be surprising if the opening credits for every mission they appear in didn't spoil that they were coming. E7: Red Brass While it's possible to extract two of the three commanders before they even reach Da Wialo, there's no reason to do so when they willingly put themselves in range of all of Big Boss's love, anger, and sorrow. E8: Occupation Forces This is one of the easiest missions in the game to get No Traces on. Just bring a vehicle and D-Horse, block the road with both, and Fulton all three vehicles in the convoy while they're stopped and honking. Regrettably I will have to actually engage the enemy, but it all works out in a rather surprising way. E9: Backup, Back Down This mission is fine, but I hate it because it isn't really a Metal Gear mission. You're on a clock to eliminate armored fighting vehicles, though technically you can complete the mission after killing just one (S Rank will usually elude you though without the bonus points). This would all be much easier if the engine didn't make landmines stop working past a certain distance, but apparently Hideo Kojima doesn't quite get what landmines are for. E10: Angel With Broken Wings A fairly easy rescue mission that only becomes difficult if you linger to rescue the extra prisoners at Lamar Khate Palace before their execution and then head for the outpost to rescue the main target. As it happens, we exit the mission with Malak in tow before any of the prisoners are executed anyway, not that it matters for ranking purposes. E11: Cloaked In Silence The first true "boss" in MGS5 if you don't count the Skulls in Episode 6 (and I don't, since you can just avoid them). Quiet is a sniper with deadly accuracy and the ability to kill you in one or two hits, plus invisibility and running like Sonic the Hedgehog, among other things. There are many cheesy ways to easily defeat her, but we're using a particular vintage since many of the cuter ones (airdropping a box of supplies on her head) are not allowed. The ending is not what I expected. Also, Quiet's normal outfit is a skimpy bikini, which you'll notice she isn't wearing here. That's because I installed a mod that forces her to actually wear clothes, game lore be damned. So your whole family can watch this episode, I guess. More episodes coming as I get around to playing and editing. I've managed to get up through Episode 17 so far, so I'm about halfway through the unique missions (not counting variants, which I may or may not do).
- 16 replies
-
- 1
-

-
- mgs5
- the phantom pain
- (and 3 more)
-
E41: Proxy War Without End Spoilers: It ends next mission, when MGS5 runs out of ideas. But at least the last idea is a good one. This one's not bad either, it's African Backup, Back Down but not.
-
Mission 32: To Know Too Much We begin Chapter 2 with a mission that's actually kind of neat if you don't attempt to S rank it, which seems counter to the entire point but okay whatever you say Konami. E35: Cursed Legacy Yes, we did go from 32 to 35 and it's not a mistake: 33-34 are replay missions with additional rulesets which don't really make sense with this gimmick and are largely irrelevant, so I'm skipping anything that's not new. That will rapidly prove to be most of the remaining missions in the game. This is the only mission in the entire game that requires you to Fulton anything. I don't think it even lets you start the mission without the Cargo upgrade. E38: Extraordinary No it isn't.
-
E30: Skull Face & E31: Sahelanthropus Why did I make this.
-
E28: Code Talker A simple rescue, other than the Sniper Skulls and the zombies and other stuff we mostly just kind of try to ignore as best we can. E29: Metallic Archaea The one time you're actually forced to fight the Skulls. These have armor, telekinetically throw exploding rocks, and are just general dickheads, but they have one critical weakness: Their pathing is really stupid and their armor cannot protect them from multiple direct hits by a high explosive round. A major design flaw, if you ask me. Good thing Zero Risk Security left all this stuff lying around their heavily-fortified empty airfield, since I certainly didn't bring anything useful myself. Sleep Grenades wouldn't have worked like last time anyway, as the Skulls begin the mission fully alerted to you and I don't think you can lose them and make them stand down.
-
It came out simultaneous on PS3, 360, and Steam if I'm remembering right. E26: Hunting Down This one is interesting because the target moves across the open world, instead of sticking to bases or roads. It's still quite easy, but it's a shame there weren't more missions like this throughout the game as it makes the intel file that shows the target's route a lot more valuable to a first time playthrough, as opposed to just telling you something that was probably obvious because there are only so many bases/outposts in a mission. E27: Root Cause I did say I wouldn't use other buddies unless it was amusing, and I think this qualifies. Plus, D-Walker always costs at least half the allotted GMP budget, so I think it's fair as long as I don't run over that. This run acquires the No Traces bonus by zipping across the countryside on D-Walker, who is shockingly maneuverable for a two-legged robochicken, and snagging the Intel Team member before he does anything stupid. Two rather short missions, but up next are quite a few longer ones as we approach the end of MGS5's "storyline" (such as it is). And then they get short again. Real short. Comically short. "Konami pulled the plug" short. Well, you'll see.
-
E24: Close Contact Fences. My one enemy. I mean, plus the Soviets, the African PFs, and Skull Face. E25: Aim True, Ye Vengeful Infinite Heaven broke and started me in the chopper so I rolled with it and I think the music made me better at the game because that was a smash and grab.
- 16 replies
-
- 1
-
-
- mgs5
- the phantom pain
- (and 3 more)
-
E22: Retake The Platform This one's not actually scored, because it's more of a FOB invasion tutorial, but it still works okayish as a mission even if it's not terribly difficult. It does take into account Mother Base's status, so if you have a fully-developed four platform R&D strut, as I do, you've got to go farther and bypass more guards to reach the main platform and take out the commander. E23: The White Mamba Eli gets chumped. I probably gotta stop using the Stun Arm. And yes, riding directly into the base is that easy. If you're ballsy you can ride (with leaning) straight up to the boat. Man, who would've thought child soldiers sucked at military stuff?
-
E21: The War Economy Another mission that ends up being somewhat uneventful if you do it "properly," but doing it improperly is just less optimal so it ends up being kind of whatever. I do hold a man on a Walker Gear up through a wall so that's fun.
-
E20: Voices The first No Traces score of the run sees us "defeating" the Man on Fire by... not really defeating him I guess. No Traces is fairly easy on this mission if you Fulton him out after the water tower incident, but since I can't do that I have to legitimately escape him while he's still hunting me. This requires manipulating his AI so that he misses/can't hit Pequod during the extraction, because he can and will destroy the chopper and kill you if he's given the chance.
-

What (in your opinion) are some low-hanging fruits for making FFT 1.3 better?
Nakar replied to pogeymanz's topic in Development Discussion
True, but Fire Emblem for the most part has deterministic AI and fixed enemy stats. An example of where I think it's a problem would be if a certain enemy in Ch1 of Awakening Lunatic+ could random their Strength to either be high enough to damage Frederick or not, and if it couldn't damage Frederick it wouldn't move. Since a huge part of the Ch1 Lunatic+ strategy involves manipulating Frederick to take hits and eliminate problems on a very tight timetable (since Frederick is really the only unit capable of it), an enemy randomly either moving up on him and dying to a counterattack or not moving at all can completely throw off the map balance. This did still happen with Lunatic+ skills which is probably one reason why Fates Lunatic doesn't do random skills even in Conquest, which is the hard route for series veterans. Being able to see enemy stats on deployment would help, but because there's often still a touch of randomness in gear assignment and Zodiac compatibility, you'd still end up having to know the AI backward and forward to know whether that Ninja is going to come in on you or not. Still, it'd be better than not even knowing what Zodiacs the enemy has until the map starts. -
E19: On The Trail Mostly just goofing off, as a fully-charged Stun Arm does what I do here in vastly less time.
-
What (in your opinion) are some low-hanging fruits for making FFT 1.3 better?
Nakar replied to pogeymanz's topic in Development Discussion
Frequent resets should not be encouraged behavior in a tactical RPG. It's one thing to restart a bunch and tweak your strategy or setup, but having to do it because sometimes the first enemy to move can kill two of your guys (or something unrecoverable, whatever that may be) isn't a good thing. If early misfortunes caused by randomness balance out in the grand scheme of a battle, then no big deal; however, that isn't always the case with 1.3. And rerolling a fight on purpose for more favorable enemy Br/Fa/Zodiac is, in my mind, basically cheating and should not be encouraged. It's fine if it's random but choosing to repeatedly reset until the randomness is in your favor is exploitative. The ideal setup should be to encourage the player to roll with the misfortunes and fortunes alike, assuming they're balanced such that you're likely to experience a bit of both in every battle. -
What (in your opinion) are some low-hanging fruits for making FFT 1.3 better?
Nakar replied to pogeymanz's topic in Development Discussion
They're balanced over a long period of time or in a scenario where the first turn isn't that impactful. In Tactics Ogre, which has more people on the field and generally longer battles, you usually don't worry too much about potential random factors because what will cause a restart won't be the very first action. However, it can be a problem in FFT, and it's definitely a problem in 1.3, because when done wrong FFT turns into rocket tag with a quickness. Whether an enemy advances or retreats is also a big deal and they consider factors like compatibility in doing so, so you can never be sure if that guy's going to be lured in to get jacked or charge something nasty and wander off out of range each time you restart. If you have to restart a lot, it becomes considerably more frustrating. So one way to address the issue is just to treat the other problem and ensure that the first turn of any given map does not have a massive and potentially determinative effect on the outcome of the attempt. That's something that is an aspect of 1.3 that could stand to be significantly altered, and doing so largely eliminates problems that random Br/Fa/Sign can cause. -
What (in your opinion) are some low-hanging fruits for making FFT 1.3 better?
Nakar replied to pogeymanz's topic in Development Discussion
There were good and bad points to Death as implemented, from a balance standpoint. The only things I'd add to your general overview of its effectiveness: When Death did miss and dealt damage instead, it dealt quite a lot; this made it worth using Vanille's entire ATB bar on Death as an alternative to Ruin spam as a Commando or something. Death could only be cast in SAB which prevented Vanille from gaining damage bonuses from COM (though she could get the passive benefits of the other two party members being COMs, or the debuff boosts from both being SABs as well). That allowed the developers to make it incredibly strong because it was inherently impossible to use in Cerberus. Death actually worked on things and could instant kill even powerful marks like Ochus and whatnot. These are really good things and made Death worthwhile, but they did lead to one small problem that does remind me a bit of 1.3: Because there were no consequences for resetting a battle in FFXIII, there was no downside to fighting something way out of your depth and just starting over if you couldn't get Death to land in time. On the one hand, it's nice that Death actually did something. On the other hand, fishing for a Death proc felt cheesy and not terribly rewarding when you did win with it and you knew there was no way you could've won without it. While the ability to influence its proc rate via debuffing made it feel more like a legitimate strategy than a pure gimmick, it could still prove rather gimmicky against things with a low-but-nonzero chance of being affected by it. I've always felt that things like random Zodiac and Br/Fa are the same kind of thing in FFT. The difficulty of a battle can be completely up in the air depending on something as simple as the compatibility between the first enemy to move and the nearest ally, and that's not only bad from a strategic standpoint -- I can't predict or plan when enemy behavior changes when I do the same things each time, unless I have encyclopedic knowledge of the game's AI -- but also from a player frustration standpoint. They add depth to the system just as Death does, but in a way that can occasionally encourage scummy reset style gameplay that's tedious when it doesn't work out and unsatisfying when it does. A risky strategy involving a powerful but conditional ability is perfectly fine, but when it's random or it doesn't feel like there's a viable alternative (which there often is in FFT, hence why the randomness isn't a huge gamebreaking problem), it can sometimes feel like the game is suggesting you use something that might work but probably won't for reasons outside your control. Not that I have any good ideas on how you address that issue or if you even can. If nothing else I don't see how you'd do Zodiacs except either having them be fixed per battle for consistency's sake (which makes them exploitable with foreknowledge and doesn't help with random encounters) or leaving them random and just accepting that they'll alter the AI's behavior in potentially large ways each time you approach a battle. -
E18: Blood Runs Deep I complete my mission objectives to the exact extent that the game requires, and that's what makes me a true hero. Sorry about that, kids.
-
E16: Traitor's Caravan Awww, they're so sleepy. E17: Rescue The Intel Agents Noctocyanin or just foreknowledge of the mission (or D-Dog) trivializes the first agent, and the second is quite easy to extract. He can't be Fultoned (even with the Wormhole), but I'm not Fultoning anyway, so the only flaw in my plan is that D-Horse can only carry one man. Hmm. I wonder if I can catch a ride.
-
E14: Lingua Franca This is an especially easy mission by any standard once you've played through it at least one time and know the Viscount's location. To spice it up a bit, I'll go ahead and rescue all four prisoners even though that's not required. E15: Footprints of Phantoms Finally, a mission where "eliminating" something doesn't require you to Fulton or kidnap it if you want to avoid losing Perfect Stealth, No Kills.
-
E13: Pitch Dark Our first visit to the Angola-Zaire Border region sees us in yet another base, this one rather onerous during the daytime due to all the angles and open spaces. We make it work, and even make it work for us. Not intentionally of course; I'm not that clever. Incidentally, isn't it weird that you punch with the non-bionic arm except when doing the sprinting punch? You'd figure, I dunno, you'd want to hit people with the hand that's made of metal. These last two were fairly long, but shorter videos will remain the order of the day until E18: Blood Runs Deep, so expect 2 or so per update until then.
-
E12: Hellbound Another "story" mission, this time to rescue Otacon's shitbag dad from the Soviets (frankly the second nicest thing Big Boss ever did for them, after kidnapping half of them to serve in Diamond Dogs). Nothing terribly exciting to this one; it's a story mission akin to Where Do The Bees Sleep?, but without the interesting approaches that mission allowed for. It is the first mission to take place almost exclusively in bases, allowing us to finally utilize one of the 8000 urban camos the game throws at you since FOBs are all metal/concrete and thus most of the reward camos are as well. Once clear of this mission, we'll be done with Afghanistan for a while and headed to slightly-less-rocky-everywhere Africa... where we'll immediately end up in another metal/concrete-heavy mission, I guess. Welp!
-
A note on X-Magic: While X-Fire2 is more efficient (the power of Fire3 for 2/3 the cost), there is sometimes merit to spamming X-Fire3 instead for raw damage. Many WoR bosses are vulnerable to fire, and between his high Speed and the Sage Stone it's very easy for Locke to dump his MP reserves into doing 10k+ damage per turn with Rogue Cloak-boosted fireballs. A boss can't screw over your party if it's dead so fast it doesn't know what happened. But when I say "dump" his MP, I mean that; Fire3 is ridiculously expensive and Locke is casting two of them per action. This really demands either Edgar/Gogo mainlining him Mana Battery charges or the use of Ethers. It's not a strategy that's good for everything, but properly executed one or two Ethers is well worth steamrolling an otherwise threatening boss. Also, regarding a hidden item acquired through Steal:
-
Something worth noting about Cyan's healing: He's not a particularly great in-combat healer due to low Magic and Speed. Useful for patching up or reviving your real healer if they go down (since odds are Cyan isn't going to be the one dying first), but not particularly reliable even after getting the Nirvana Band. However, Speed is completely irrelevant outside of combat, and Cyan has very little use for his MP other than healing, so Cyan is one of the best "field medic" characters in BNW, able to blast a flurry of Cures and a couple Lifes after a hard fight to get everyone in shape for the next one. Because Empowerer almost always steals enough MP to completely refill Cyan's reserves, you can just use Empowerer every 2-3 battles when his MP is dwindling and get a full restore. Result: Cyan can sustain a party throughout a dungeon's random encounters without needing to use expensive items and with no need for Tinctures/Ethers or other forms of MP restoration. This is incredibly useful in the midgame WoB where Tinctures are expensive and Ethers barely exist, and remains incredible all the way through due to the prevalence of long and dangerous dungeons in the WoR (Phoenix Cave, Narshe if you're doing the whole thing in one go, etc.).
-
Ultros will mention this but it resets everyone in the active party, i.e. the (up to) four people currently in the party. Make sure you bring four people that you actually want to reset to get your money's worth, especially if you're doing 100k respecs.
-
I get that, but "doing what is best at the moment" is an entirely valid way to (ab)use builds now that there is the option to reset them. The main thing about it is that you can't just do it for everybody; you have to pick no more than 4 people and reset them all together to not have the cost be prohibitive. I'd say the 25k respec is a valid consideration but would argue that the 100k ones are not because at that point you're probably grinding GP to such an extent that you might as well just (theoretically) respec everybody for every new dungeon/boss, and there's no point even discussing builds if you're doing that. So just a note on a few characters or a general note about how four characters can be reset cheaply but after that it's too expensive to consider, so you don't have to waste your time on too in-depth of a writeup. You could even just include the respec option in a single line for some of the builds, e.g. mention for Cyan's Vigor build that you could also go straight Kirin and respec if you wish to use the EL reset, but leave the suggestion of 5 Kirin intact for people who don't want to reset and don't want to use a different build in the WoB.
-
It might be worth noting that planned respecs are a thing; while you wouldn't want to pay to respec all characters (~225k+ is not cheap), the first EL reset is a more manageable thing (it's like buying a couple Crystal pieces) and enables things like taking Kirin on Locke for WoB bulk but swapping it all out for Phoenix once you have him back. It should probably also be pointed out that Stamina Cyan or Vigor Sabin can pivot into the other build with zero downside in the WoR once the +60 HP espers are acquired, if desired; for Cyan especially it ensures he doesn't ever give up bulk and naturally transitions him from Dragon/Eclipse to Tempest/counters when each of those abilities hits its optimal peak. Likewise there's no real reason to not go Bank or Slots on Setzer pre-WoR if you happen to have the extra ELs; sitting at EL10 is a waste if he's at EL12-15 around the FC and Daryl's Tomb, as that's another 60-150 base HP which never hurt anybody. I'd also note that if one wants to go Alexander/Crusader-heavy on Celes, her WoB/early WoR build can be literally anything since you'll probably want to reset her anyway. Maybe a general section on respecs that advises that the first four characters reset are relatively inexpensive, and a recommendation of certain characters (Locke, Celes, Cyan, Edgar maybe) who are good candidates for the cheap reset once certain WoR espers are acquired if you want to do those builds (otherwise there's no point in a reset), while suggesting builds that are good prior to that point that they'll intentionally switch out of, i.e. instead of 5 Kirin on Cyan for a Vigor build consider going full Kirin and then swapping after Alexander into pure Bismark/Alexander. Perhaps noting that due to the greater costs to respec additional characters that one should be more careful building people who have distinct WoR-centric builds (Setzer, Relm, Mog) unless you are either using them in the WoB or are certain you want to go with builds available earlier. There's no real point in Relm even spending her ELs if you're going to bench her for the FC and are interested in doing a Stamina build since she won't even have Starlet and Bahamut to work with until she's rerecruited. Better to just let her keep her ELs unspent and decide what to do with her once she's back than reset her when she barely saw use anyway. Also apropos of nothing but there should probably be a nice little guide about esper equip bonuses and what they can be useful for. I might write something up on that since it isn't too complex. Not sure if it should be per-esper or per-character; probably the latter since even straightforward espers like Kirin have slightly distinct value for Locke or Cyan.